OZEKI Phone
Webphone
Menambahkan Online Phone di website Anda.
Anda ingin menambahkan Online Phone pada website Anda? Gunakan Webphone.
How to add a Webphone to your website
By connecting a webphone to Ozeki Phone System XE you can provide your customers the ability to reach your support staff easily. Any web browser is capable of handling microphones and web cameras, making voice and video chat become available. This leads to numerous new possibilities: fast, effective and easy-to-use availability (results in higher income) for companies, great quality communication and also fast, effective and easy-to-use accessibility for the customer.

Video tutorial series:
How to create and customize a webphone then add it to your website
How to create and customize a webphone then add it to your website
Configuration steps:
Step 1: Login to the Ozeki Phone System XE
Step 2: Add a webphone outside line Step 3: Test and generate HTML Step 4: Customize your webphone |  |
One of the most important factors of a company's effective work is the troublefree communication with the customers. Customers expect a company to have a customer service available fast and easy, so companies should choose the most reliable and the most comfortable communication solutions for their customers as well. When expanding a business, in order to achieve the maximum level of the quality and availability of the service, the existing and potential customers' demands must be estimated.
Webphoning is a very comfortable way to communicate with your customers, being directly accessible from the website. Look at how it works. The website visitor is surfing on your web page on which there is a 'Call me NOW' button. If the visitor clicks on it, a call will be initialized to that employee of your company, who deals with the calls coming from the webphone. It is absolutely free for your customer.
What does YOUR COMPANY NEED for using the Webphone TechnologyWebphoning is a very comfortable way to communicate with your customers, being directly accessible from the website. Look at how it works. The website visitor is surfing on your web page on which there is a 'Call me NOW' button. If the visitor clicks on it, a call will be initialized to that employee of your company, who deals with the calls coming from the webphone. It is absolutely free for your customer.
In order to make a call through a website, a webphone is required: the webphone is a client-server application. The "client" is a program that can be integrated into the website of the company. This client is connected to the webphone server, and this server will forward the call to the other party of the dial. The other party can be another webphone, a softphone, a traditional IP phone or a call center.
This webphone will operate on the company's website, being part of the page(s), the customers can access any time the phone numbers/extensions shown in the website while browsing. The Ozeki Phone System XE software builds up the communication channels:
- there is a given website where the webphone is integrated, e.g. the company's one: this will be used by the customer who visits the page
- this webpage is connected to the MediaGateway tool (that is connected to the VoIP service provider's network) through a TCP network connection
- the MediaGateway tool is connected to the Ozeki PBX server through the VoIP network
- and the Ozeki PBX server creates a connection with the other party: it can be the internet, VoIP device or traditional PSTN based connection (this latter one needs an ATA adapter to build up the connection) - the employees of the company will see this side and the called phones will ring here
The SIP protocol is only needed in the build-up and break-up of the connection, so as soon as the connection is built up between the webphoning customer and the company, the RTP protocol replaces the SIP protocol until the call ends. The RTP protocol is required for every internet based chat and this protocol carries the video and sound packages. After finishing the call, the SIP protocol gets the control back and breaks up the connection.
Types of Webphone applications
Depending on the service you intend to provide, you can choose between two solutions of webphoning.
The simpler version is called "click-to-call webphoning": it means that next to the phone numbers, that were shown in the webpage, a small "CALL" icon appears. The visitor can make a call with clicking on "CALL" icon.
The simpler version is called "click-to-call webphoning": it means that next to the phone numbers, that were shown in the webpage, a small "CALL" icon appears. The visitor can make a call with clicking on "CALL" icon.
The other possible solution is the full feature webphone, what is a standard softphone application. In this case the visitors are allowed to call any phone numbers - the phone line is provided by the webphone system. This is useful when more than one phone number or extension can be found in a webpage. Of course the owner of the webpage can restrict the available phone numbers in order to avoid the misuse of the free lines.
The calls, which were made from the webpage, will be connected by the TCP protocol to the Ozeki Webphone server. The server will forward it to the proper direction, independently from your choice between the click-to-call or the full feature webphone (Figure 1).
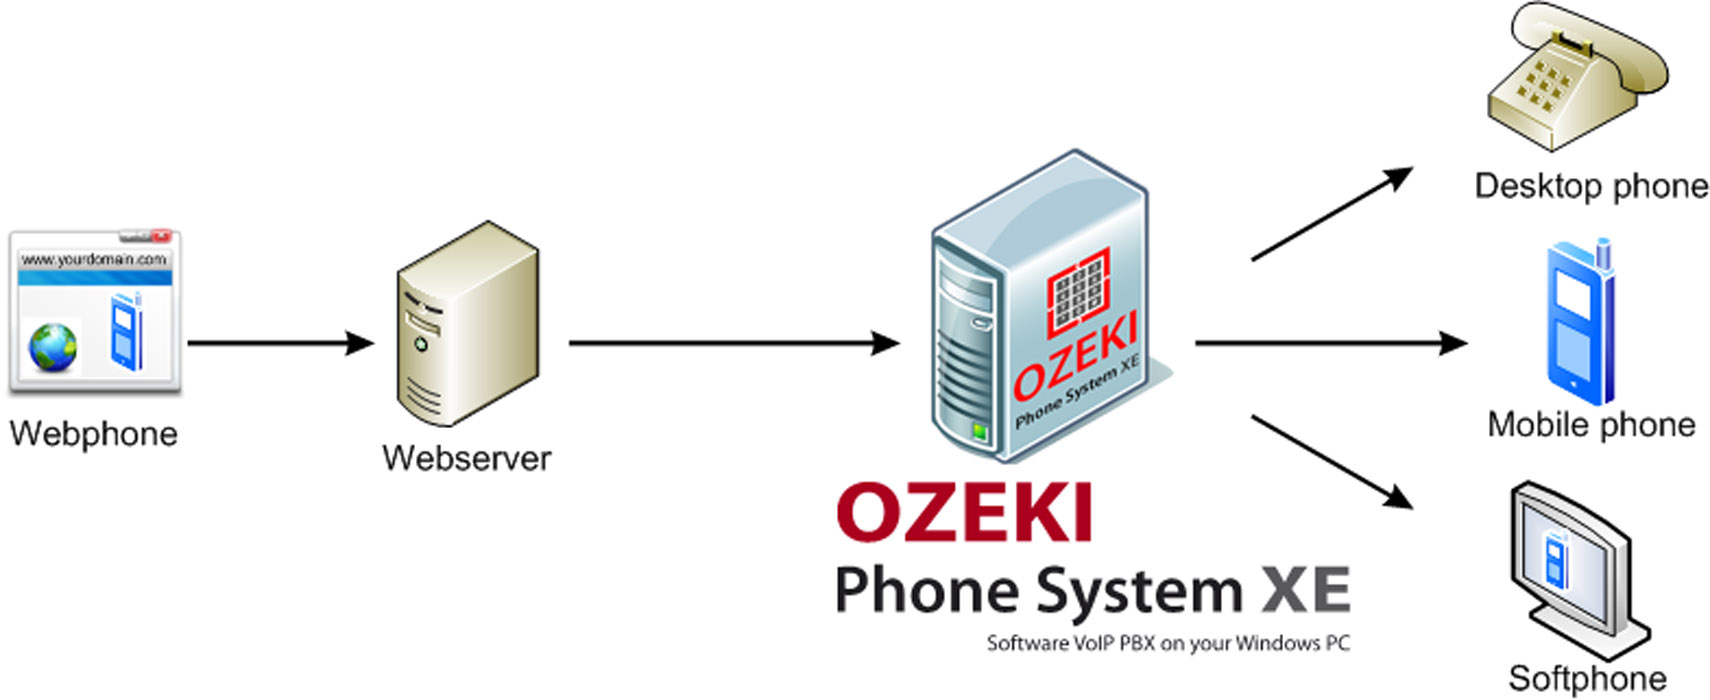
Figure 1 - Ozeki Webphone Server forwards the call to the appropriate device
What does the CUSTOMER NEED to have, to use Webphone?
Your customers will need to fulfill these basic requirements to start a webphone dial:
- a proper bandwidth Internet connection
- a microphone connected to the computer, to manage the voice call
- a web camera to manage the video call (of course this is not required - voice calls can be set without video calls)
- and a speaker or earphone so that the customer can hear the one who he/she is going to talk with
Before beginning the call, both the company and the customer can set what types of data can be given to the other party. They must allow the access to use their camera, microphone and speaker/earphone. This way it can be set e.g. that the customers can start a voice call if there is no need for a video call. Customers can also deny the camera using if visitors do not want to use it.
After studying Webphone Technology, take a look at the following step-by-step guide in order to see detailed setup instructions.
Step 1. Login to Ozeki Phone System XE
First of all, login to the Ozeki Phone System XE using your username and password (Figure 2).
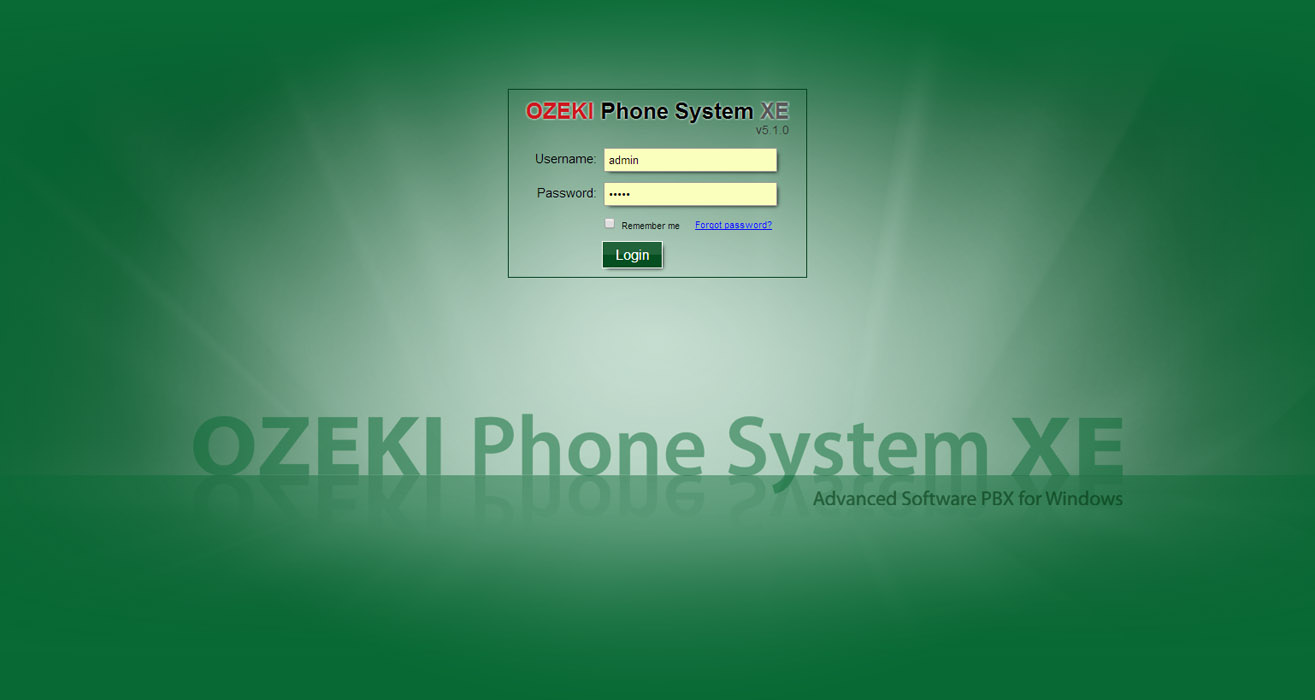
Figure 2 - Ozeki Phone System XE login screen
Step 2. Add a webphone outside line
On the left side of the screen you can see a blue bordered box called Outside lines. Click Add (Figure 3).
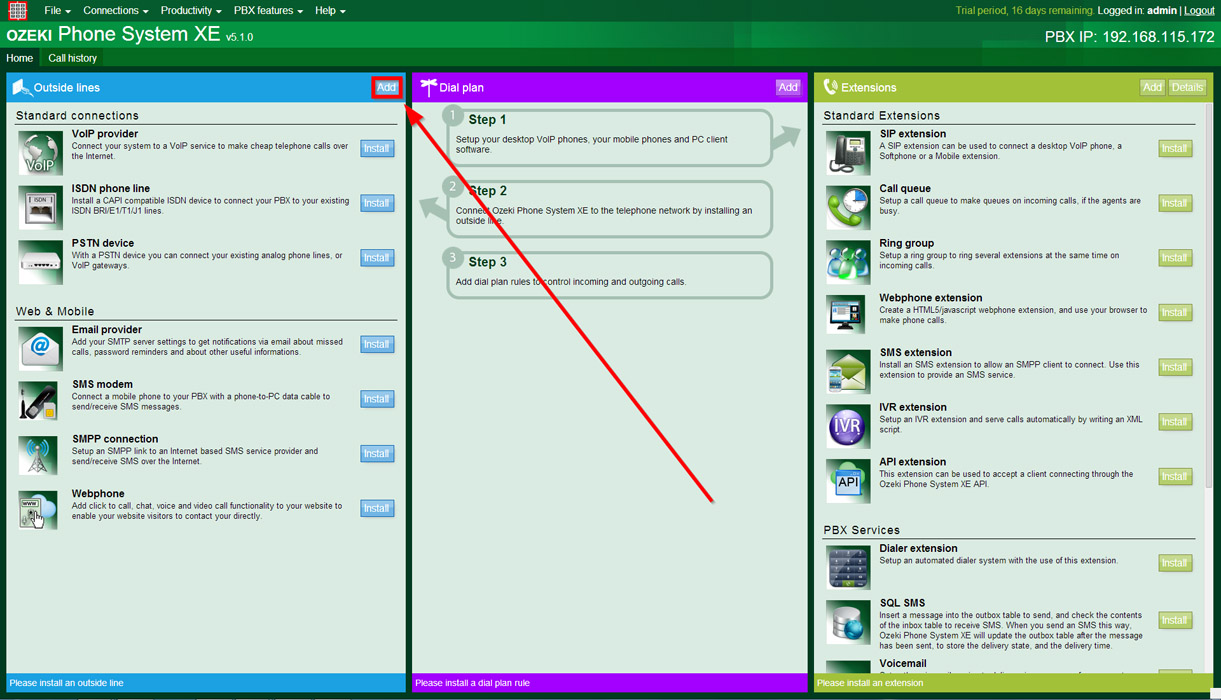
Figure 3 - Add new Outside Line
On the right half of the screen (in the Web & Mobile section) a Webphone label can be seen. Click theInstall button next to it (Figure 4).
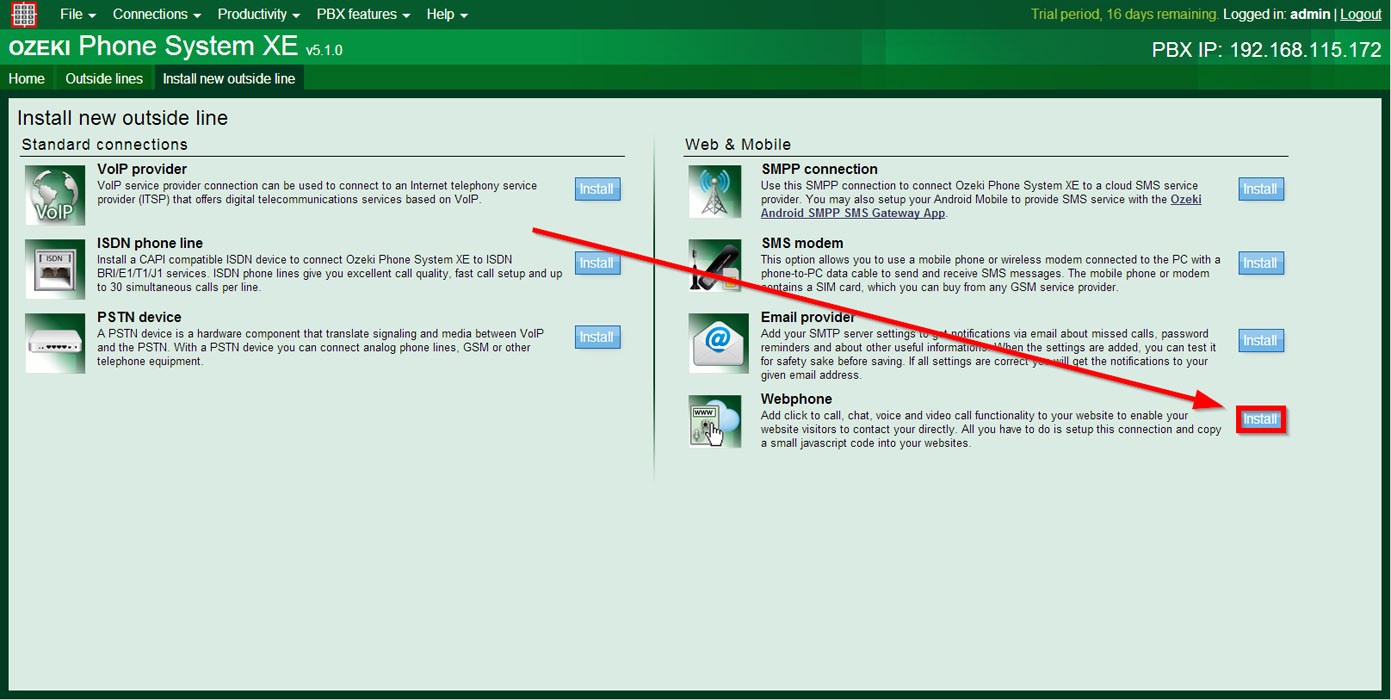
Figure 4 - Install new Webphone
Now a configuration screen appears. In the 'Identification' section you can define a unique name for this connection (or accept the default 'Webphone1' name) (Figure 5).
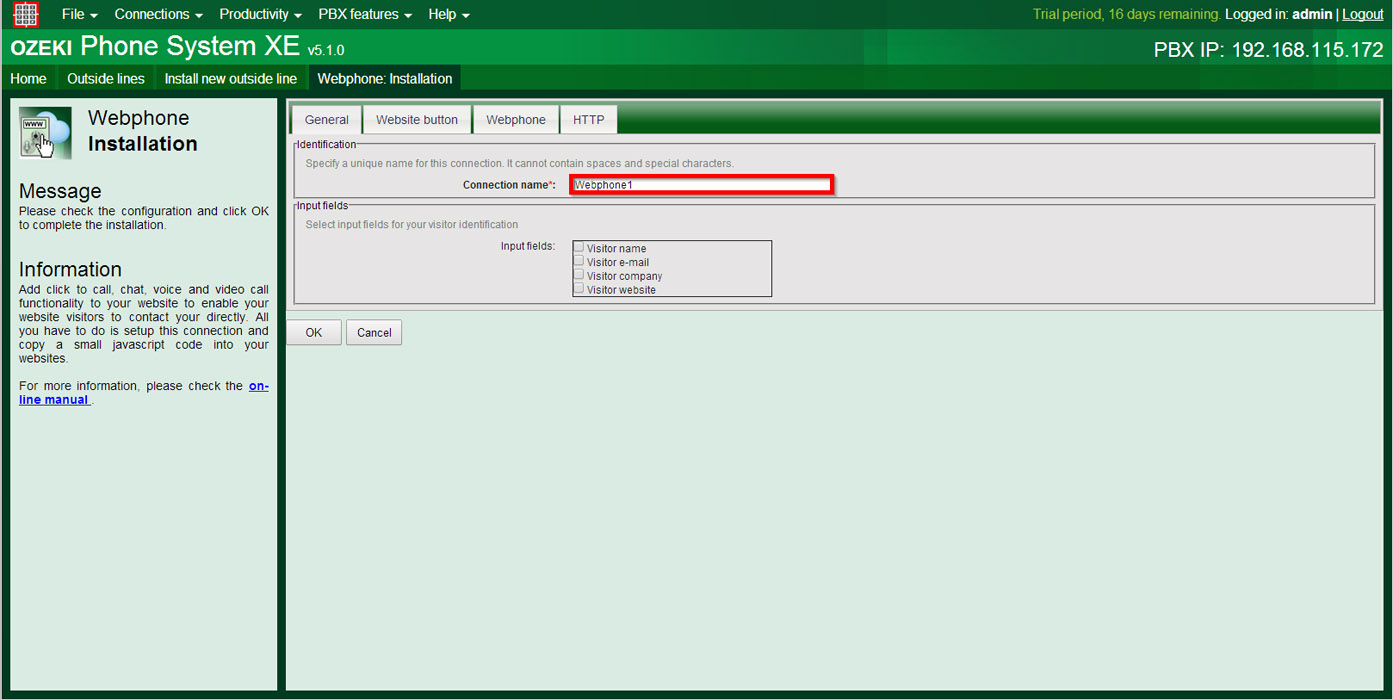
Figure 5 - Specify a name for your Webphone connection
Click on 'Webphone button' tab. Here you can add a unique website button to display operator availability by selecting the 'Custom' option and browsing an online and an offline picture as a png file (170x80px). If you want to use the default button select the first option called 'Use built in operator status display button...' (Figure 6).
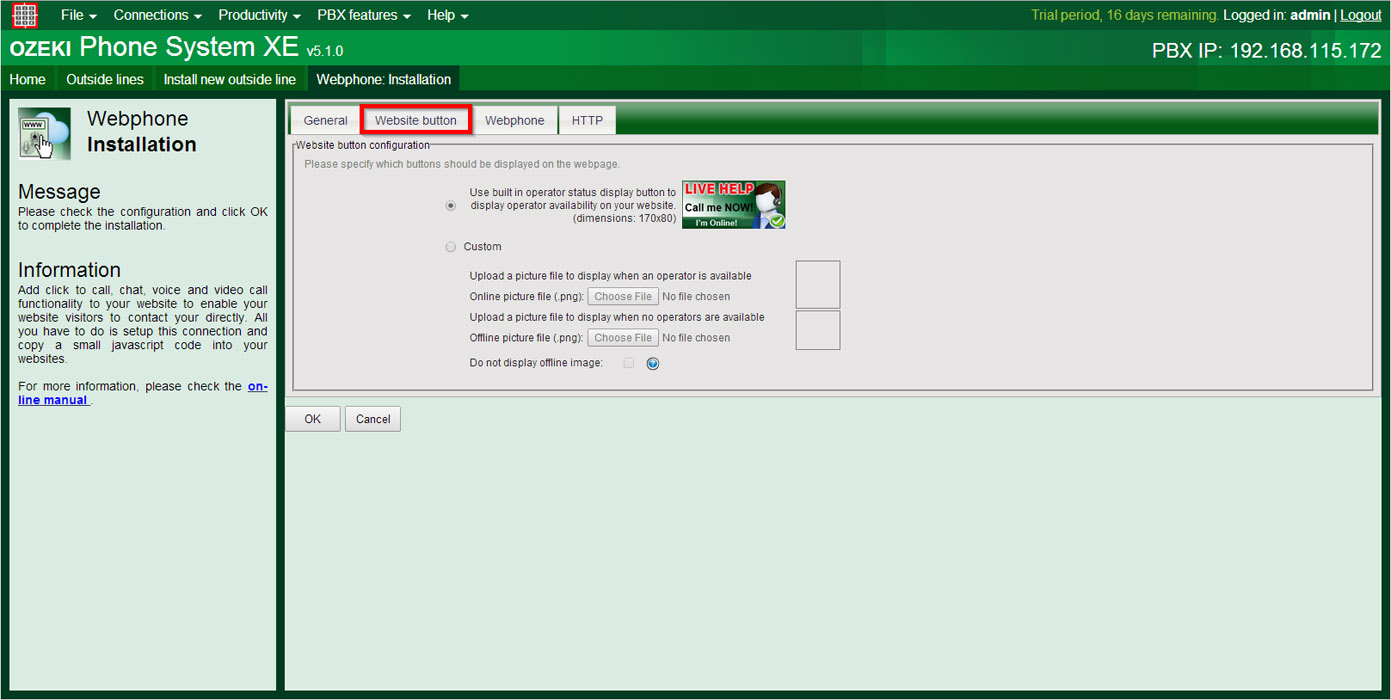
Figure 6 - Select a button for displaying operator availability
Under Webphone tab you can select which type of webphones you would like to use (Figure 7). You can choose a simple Click to Call Webphone or a Webphone with Keypad. Your third, Developer friendly option is to create a completely unique interface for your webphone.
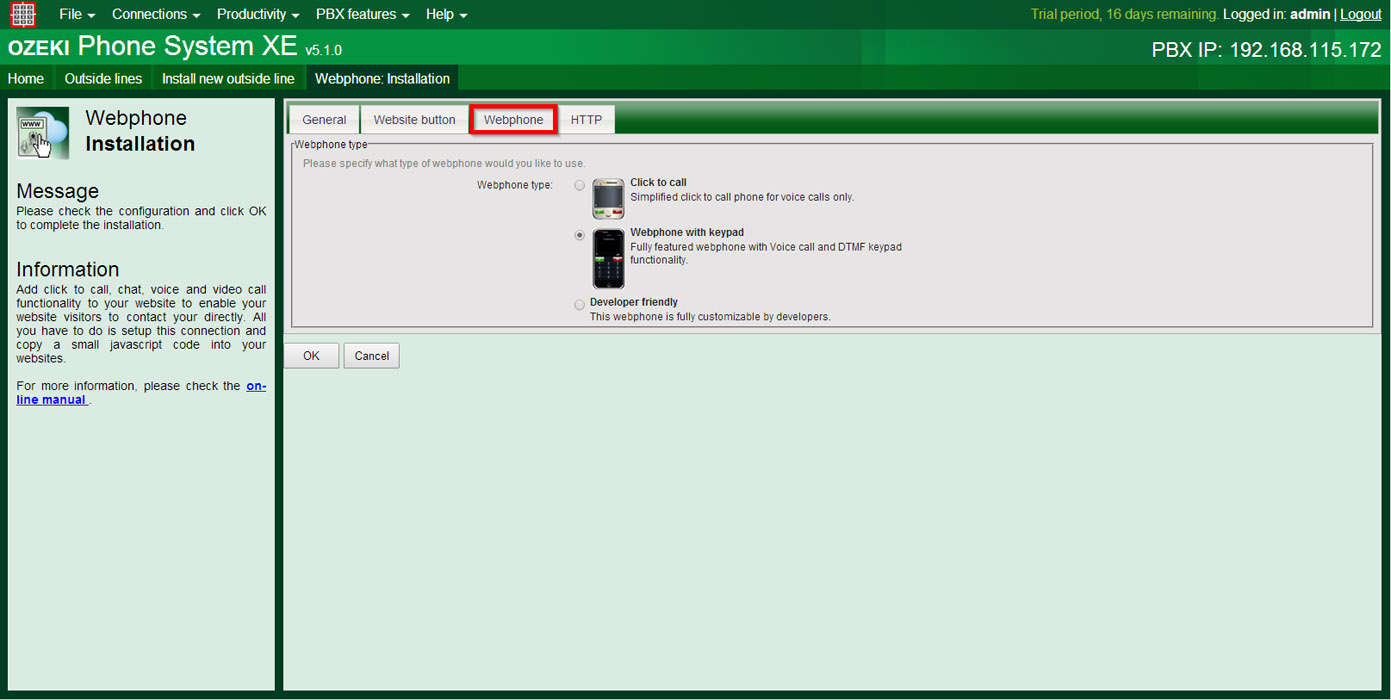
Figure 7 - Choose webphone type
Figure 8 shows the HTTP port options. By default the webphone service works on the same port like the graphical user interface. If you check the Override default settings. You can give the desired HTTP and HTTPS port, as well.
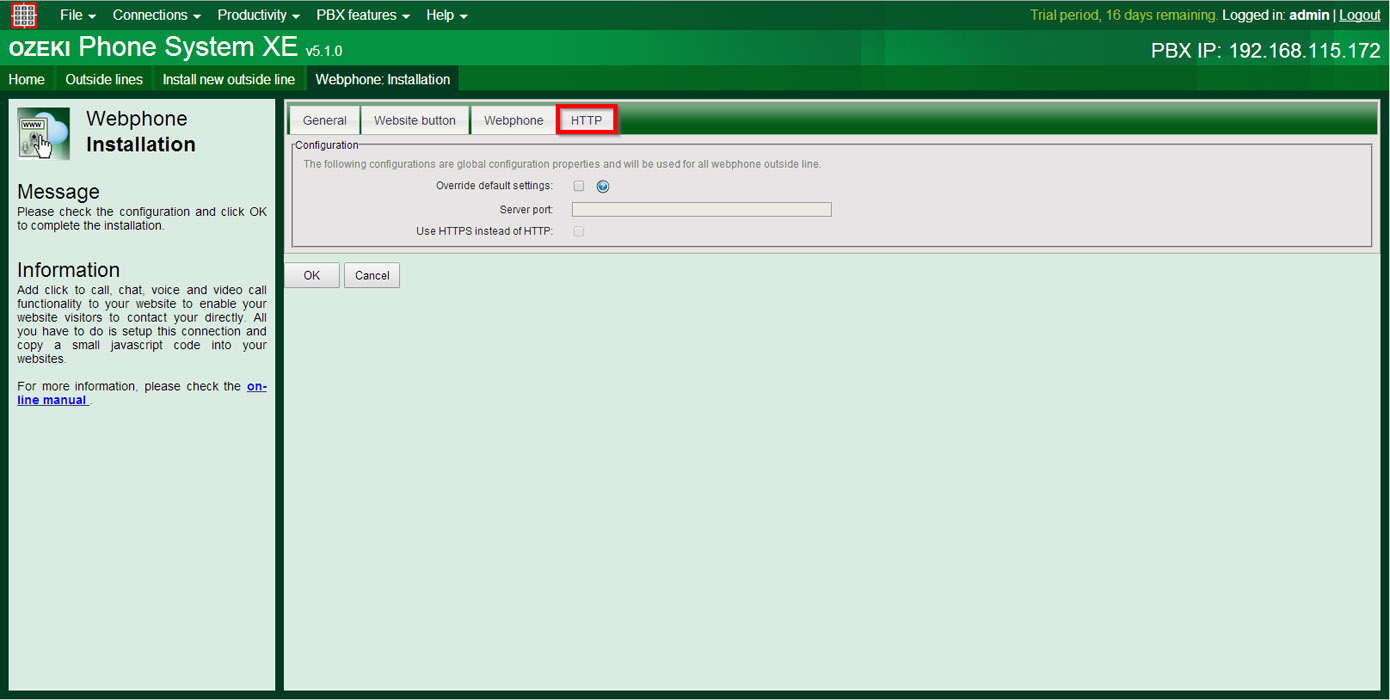
Figure 8 - HTTP settings
If you have made the necessary configurations, you should click on the OK button. After that, you can find the most important options in the menu bar on the left. (Figure 9)
Step 3. Test and generate HTML
By clicking on the ’Test webphone’ menu item, you can test how the service will work before inserting it into a live web page. (Figure 9)
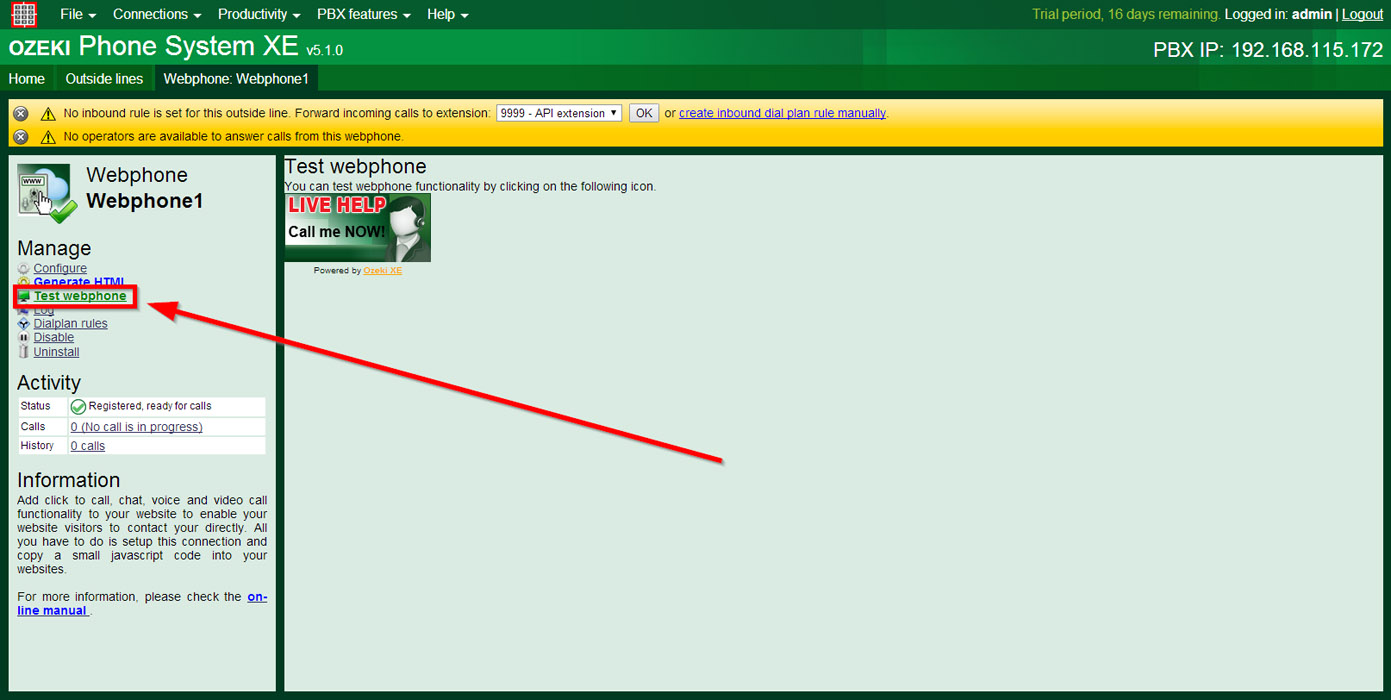
Figure 9 - How to test your webphone
If you make a call in this state, i.e. you click on the operator status display button, a new window will appear using which you can leave a message. (Figure 10)
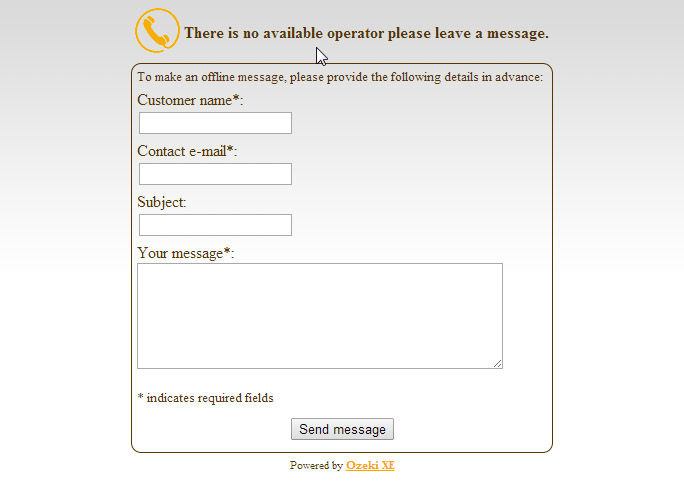
Figure 10 - If the operator is offline, this window will appear
Currently, you cannot make calls, since no routing rule has been added in order to determine where the call should be routed from the webphone. This is what the yellow bar shows at the top. To resolve this issue, you should install at least one extension or one outside line. You can install more than one if you wish to.
If you would like to make and receive calls by using outside lines, you will need to set up routing rules for this purpose within the Dial plan panel.
For example:
For example:
- to make calls which would use outside lines (PSTN, GSM networks), you will need to set Outbound routing rules.
- to manage calls, which are coming from outside lines, you will need to add Inbound routing rules to define destinations to the call. When there is an incoming call, the PBX will direct it to standard extensions or to another Outside lines, defined by the routing rules.
You can read more about dial plans and call routing rules here.
After you have picked from the list and installed what you have chosen, select a dialplan rule using the dropdown menu in the yellow warning bar. Specify that webphone calls will be forwarded to this extension or outside line. (Figure 11).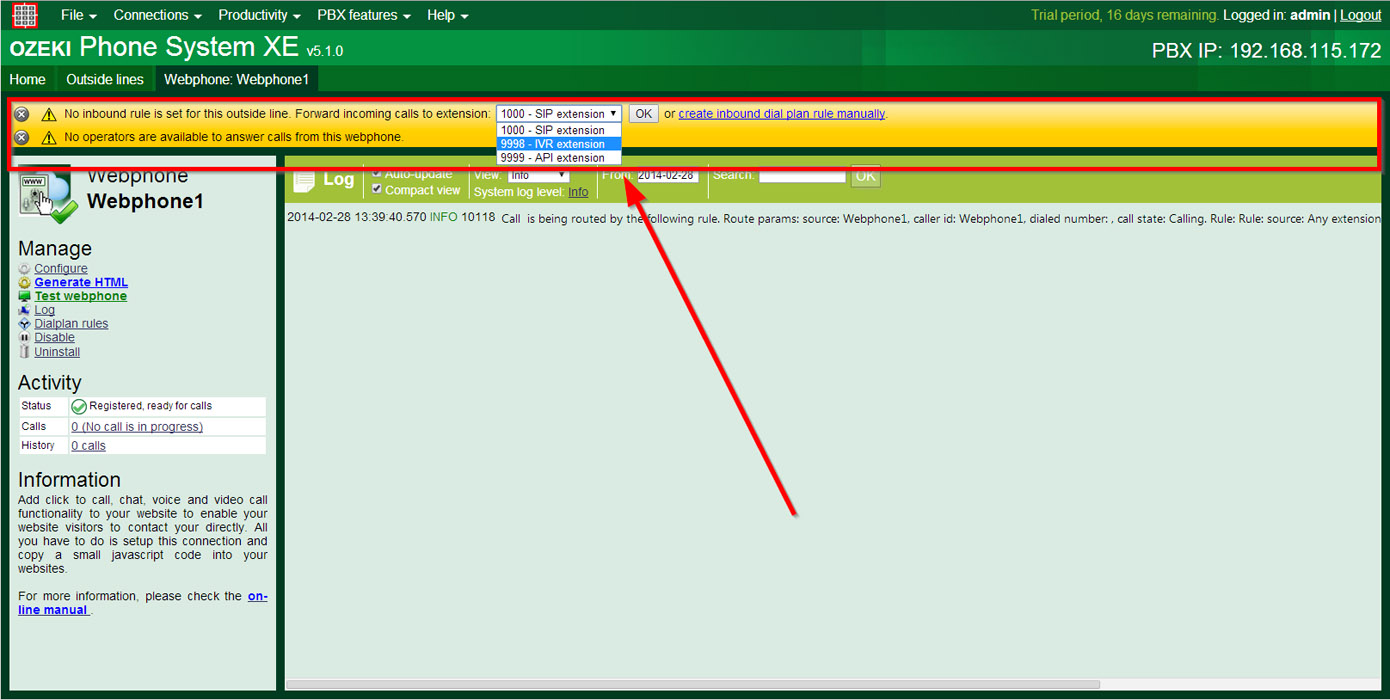
Figure 11 - How to connect to an extension of your choice
By clicking on the 'Generate HTML' menu item you can get the HTML code of your webphone. You can use this code to integrate the webphone into any webpage easily. (Figure 12).
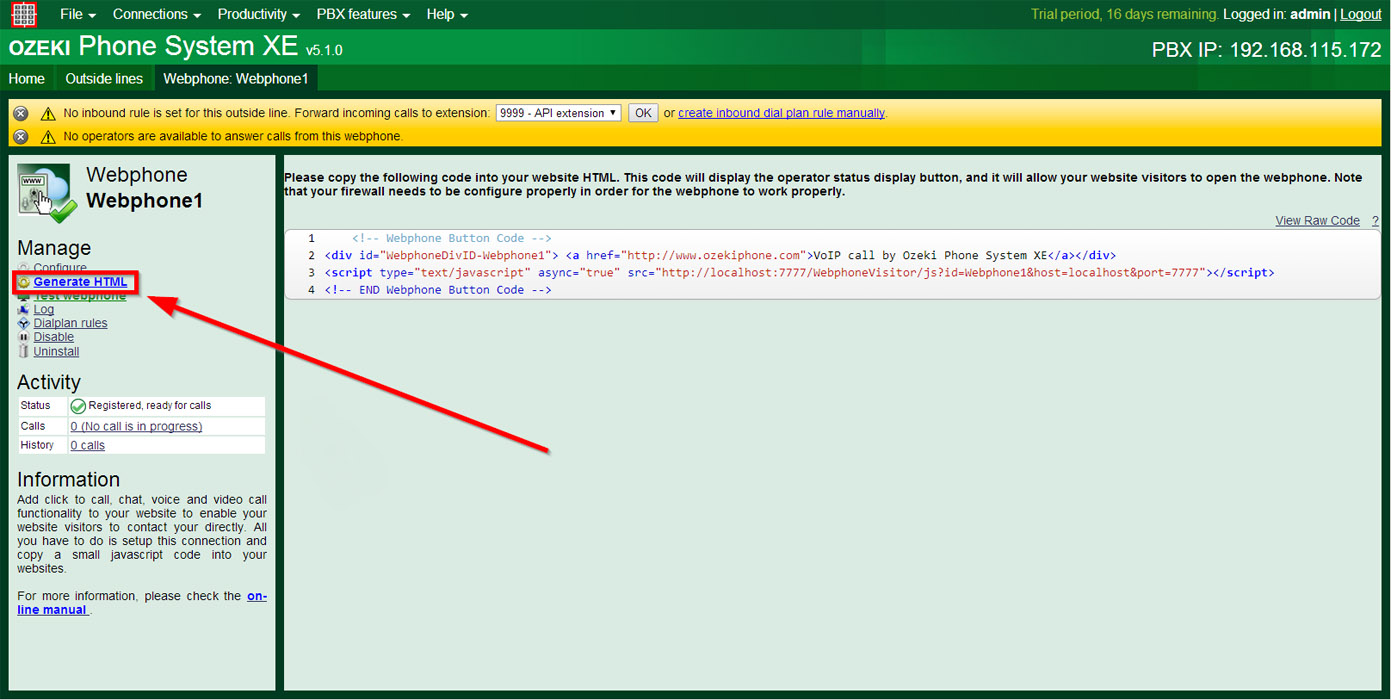
Figure 12 - How to generate a HTML button
Copy paste the javascript code from the white box into your website HTML. As a result, a webphone button will appear on your website. (Figure 13):
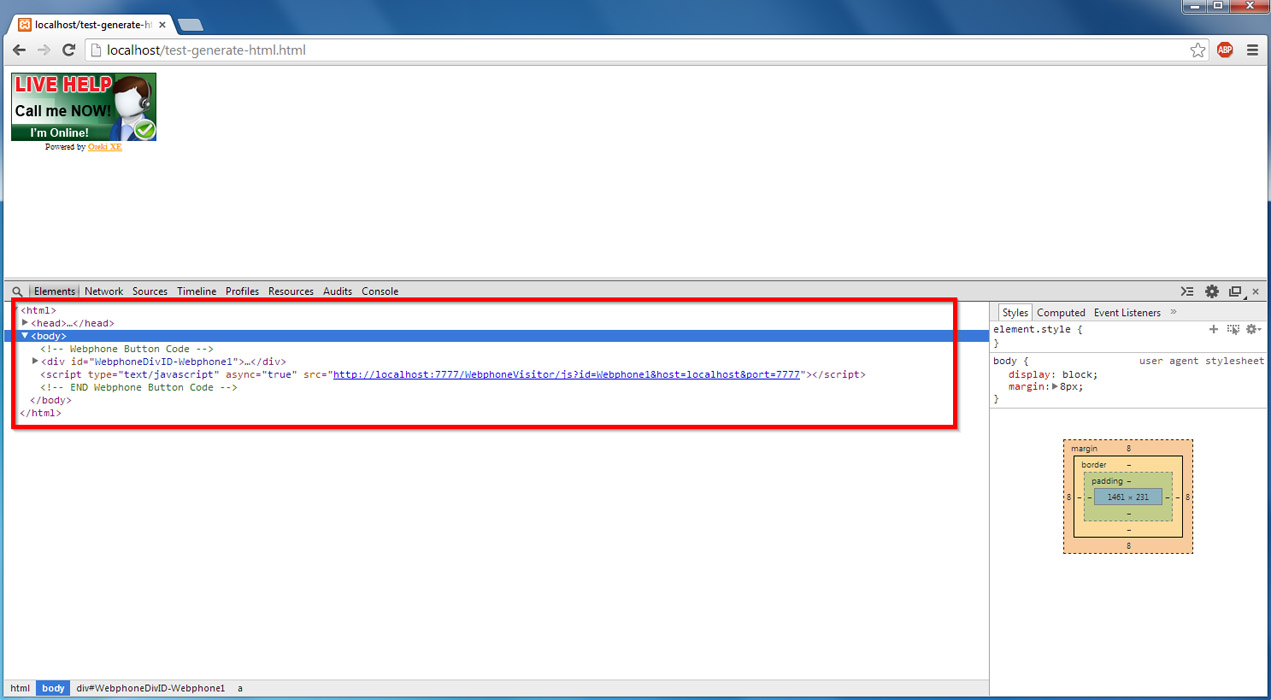
Figure 13 - Webphone in a web browser
Step 4. Customize your webphone
If you choose the Developer friendly option at the settings of the webphone, you will receive a Javascript code longer than the one before, from the 'Generate HTML' menu. (Figure 14).
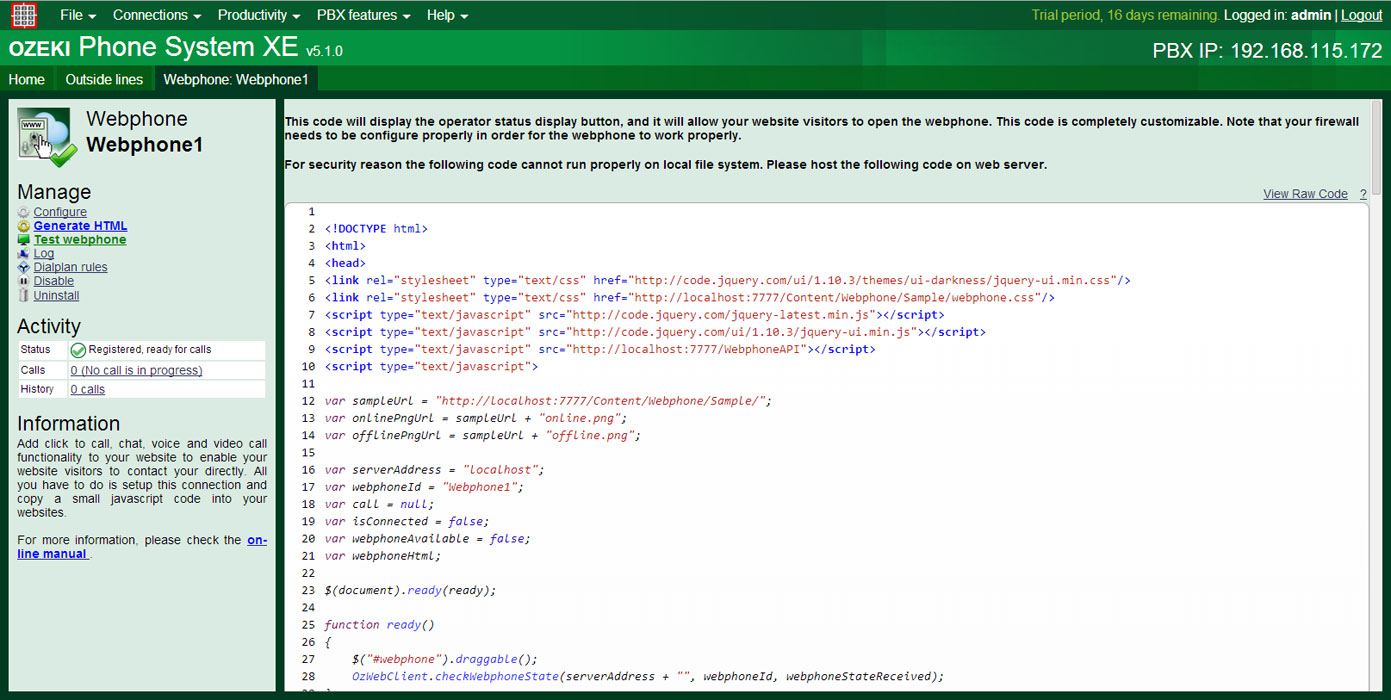
Figure 14 - The generated HTML when you choose the Developer friendly option
You can use and customize this to meet your requirements. If you have a little knowledge of theJavascript language, you can start building your webphone with the help of WebphoneAPI from scratch.Here you can find out more about how you can build a webphone with Javascript code.
Conclusion
Now you have a JavaScript webphone on your website. If you follow this guide step-by-step you are able to connect a Webphone to Ozeki Phone System XE in an easy and fast way.
Now you have a JavaScript webphone on your website. If you follow this guide step-by-step you are able to connect a Webphone to Ozeki Phone System XE in an easy and fast way.
If you have any questions or need assistance, please contact us at info@ozekiphone.com
No comments